How to Fix Squeaky Brakes
Discover effective methods to silence noisy brakes and boost your car's performance. Read our guide now to learn easy, DIY solutions for squeaky brakes.
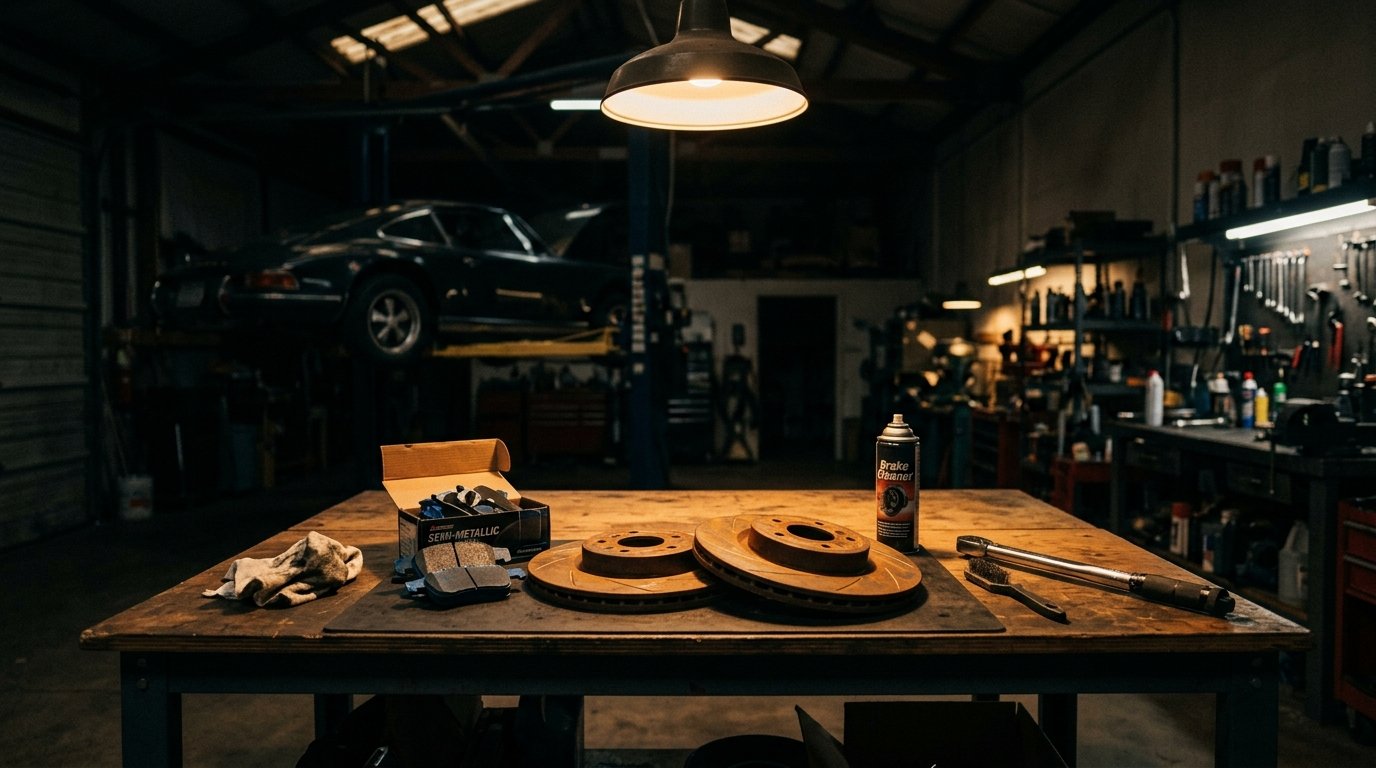
What You'll Need (Tools and Parts)
When fixing squeaky brakes, you'll want to assemble the right tools and parts to get the job done efficiently. Here's what you'll need:
Tools:
- 14mm Socket Wrench (not 15mm) – often used for caliper bolts on vehicles like the Honda Accord
- Torque Wrench – critical for applying the right force; caliper bolts typically require 20-25 ft-lbs
- C-clamp or Brake Caliper Piston Tool – for compressing the caliper piston
- Brake Pad Spreader (Specialty Tool) – sometimes free to rent at auto parts stores
- Flat Screwdriver – for removing any clips or backing plates
- Jack and Jack Stands – necessary to safely lift and support your vehicle
Parts:
- Brake Pads ($25-$75) – consider brands like Wagner or Akebono for quality
- Anti-Squeal Compound ($5-$10) – apply to the back of pads
- Brake Cleaner ($5-$7) – to clean rotor surfaces and calipers
- Rotors, if necessary ($30-$150) – check for wear and consider replacement; look for warped rotors if the squeal is persistent
- Brake Hardware Kit ($10-$20) – contains new clips and shims
Difficulty Level & Time Estimate
Difficulty Level: Intermediate
Changing brake pads and addressing squeaks is approachable for those familiar with basic automotive maintenance but requires some mechanical know-how.
Time Estimate:
- First-Time DIYer: 2-3 hours — there's a learning curve, especially if things like the caliper bolt give you trouble.
- Experienced DIYer: 1-2 hours — with the right tools and technique, this is a straightforward task.
When to Go to a Shop: If you encounter seized caliper pins or suspect more complex issues like a warped rotor beyond your skill set, it might be worth visiting a professional mechanic. Typically, this job costs $150-$300 at a shop, depending on the vehicle.
Safety First
Before starting, ensure you keep safety front and center. Here’s what you need to keep in mind:
- Personal Protective Equipment (PPE): Safety glasses and gloves are a must. Breathing in brake dust is hazardous, so a dust mask can also be beneficial.
- Vehicle Support: Always use jack stands on a level surface to secure the vehicle after lifting with a jack. Never trust just the jack.
- Emergency Protocol: Have a plan in place for quickly lowering the vehicle or stopping work if the setup becomes unstable.
Step-by-Step Instructions
-
Lift and Secure the Vehicle:
- Loosen the lug nuts a turn while the car is on the ground. Raise the vehicle using a hydraulic jack and secure it with jack stands.
Pro Tip: When placing your jack stands, choose hard points like the pinch welds instead of random frame sections to avoid damage.
-
Remove the Wheel:
- Fully remove the lug nuts and take off the wheel to expose the brake assembly.
-
Inspect the Brake System:
- Check the pads and rotors for wear. Minimum rotor thickness should not go below manufacturer spec; check your owner's manual.
-
Detach the Caliper:
- Unscrew the caliper bolts using a 14mm socket and carefully slide the caliper off. Support it with a bungee cord to prevent stress on the brake line.
-
Remove & Replace the Brake Pads:
- Note the pad orientation and remove them. Apply anti-squeal compound to the back of the new pads before installing.
-
Compress the Caliper Piston:
- Use a C-clamp or brake caliper piston tool to gently push the piston back into the caliper housing.
Pro Tip: Open the brake fluid reservoir prior to compressing the piston to make the push easier and prevent fluid overflow.
-
Reinstall the Caliper:
- Place the caliper back over the new pads, ensuring it sits correctly. Tighten bolts to the manufacturer’s torque specification (typically 20-25 ft-lbs).
Pro Tip: Double-check the caliper slides; they should move smoothly. Clean and lube if necessary to prevent future squeaks.
-
Reassemble the Wheel:
- Reattach the wheel and finger-tight the lug nuts. Once the vehicle is off the jack stands, torque lug nuts to 80-100 ft-lbs, depending on vehicle specification.
How to Know It's Done Right
- Visual Check: Ensure all hardware is in place and the caliper and wheel are securely tightened.
- Test Drive: Gently test the brakes at low speeds to confirm smooth operation without noise.
- Break-in Period: New pads typically require a short period to bed in; drive cautiously for the first 100 miles to allow for proper seating without heavy braking.
Common Mistakes to Avoid
- Skipping the Anti-Squeal Compound: This adhesive reduces vibrations, which are the primary cause of squeaking. Forgetting this step can lead to persistent noise.
- Over-tightening Bolts: Over-torquing can strip the threads, causing serious issues. Always use a torque wrench.
- Ignoring Hardware Replacements: Old clips and shims can contribute to noise issues; always use the new hardware provided in brake kits.
When to Replace vs Repair
Consider replacing instead of repairing when:
- Pads are below minimum thickness of 2-3mm.
- Rotors show visible grooves or bluing (a sign of overheating).
- The cost to replace major components exceeds 50% of the vehicle's repair value.
DIY savings are significant with brake jobs often costing less than $100 versus up to $300 at a shop.
Frequently Asked Questions
Q: Why are my brakes squeaking if the pads are new?
A: Newly installed brake pads need time to bed in. If squeaking persists, check for contamination on rotors or misplaced hardware.
Q: Can I just replace the front pads if only they are squeaking?
A: While it might seem economical, it’s best to replace pads on both axles to maintain balanced stopping performance.
Q: What causes the brakes to squeal after rain?
A: Moisture can cause a thin layer of rust to form, leading to temporary noise. This usually resolves itself quickly once you drive.
Q: How do I tell if my rotors need to be turned or replaced?
A: Rotors need attention if they’re warped, have deep grooves, or have reached their minimum thickness. Turning might suffice unless they’re too thin.
Q: Do ceramic pads reduce brake noise?
A: Yes, ceramic pads generally produce less dust and noise compared to metallic pads, making them a good choice for quieter braking.
For a complete guide specific to your vehicle’s maintenance, visit OwnerKeep.com. Our resources ensure you have what you need for every job, big or small.